Surf Spey: Core Mechanics
By Mark Severino
THE FIVE MECHANICAL LAWS OF SPEY CASTINGThe Foundational Architecture of Modern Spey MechanicsIntroduction
Spey casting is not defined by tradition, river culture, or regional style. Spey casting is defined by mechanics - and mechanics alone.Every correct Spey cast - whether performed with a long line, a short head, a two-handed rod, or a single-hand adaptation - succeeds or fails according to five biomechanically verified laws.These laws govern:
• rod load
• stroke architecture
• apex height
• loop stability
• distance ceilingModern casting biomechanics, motion-capture sequencing, rod tip trajectory research, and physics-based casting models support them.This article defines those laws. These are the mechanical truths behind Spey casting.THE FIVE MECHANICAL LAWS1. Straight Line Rod Tip Path
Geometry is the first law of Spey casting.Every Spey cast begins with one requirement: the rod tip must travel in a straight line.This straight line path is created by:
• maintaining a unified casting plane
• eliminating inward curvature
• eliminating diagonal forward lanes
• aligning the hands and rod tip on a single acceleration corridorA straight rod tip path produces:
• tight loops
• stable turnover
• efficient energy transfer
• predictable distance
A curved rod tip path destroys loop integrity immediately. Geometry is the first law of Spey casting.Research Reference: Hakamata et al., 2026 - Robotics (MDPI): Rod tip trajectory shaping suppresses vibration and stabilizes loop formation.2. Continuous Tension
The rod only loads when the line is alive.Spey casting is a tension-driven discipline. Every failure - anchor slip, D-loop collapse, loop sag, turnover failure, loss of shoot potential - originates from a tension break.Spey casting preserves tension through:
• stable anchor placement
• rising sweep geometry
• drift and slide without slack
• translation before rotation
• crisp, decisive stopDistance is not created by force. Distance comes from minimizing tension loss.Research Reference: Ekander, Perkins & Richards - Sports Engineering (2024): Rod load and energy transfer depend entirely on tension continuity.3. Translation → Late Rotation SequencingSpeed comes from sequence, not strength.The Spey forward stroke is a two-phase event:
1. Translation - long, level, linear acceleration
2. Rotation - late, crisp, loop-forming unloadBiomechanics confirms:
• peak translational speed must occur before rotation
• late rotation produces maximum tip speed
• early rotation collapses apex height and loop stabilityThis sequencing is the mechanical heart of Spey casting - the distinction between correct Spey casting and everything else.Research Reference: Anderson, Perkins & Richards - Springer: Translation precedes rotation; late rotation maximizes tip velocity.4. High Apex Geometry
The apex is the launch platform of the cast.The apex is the highest point the line reaches during the cast. In Spey casting, the apex must be:
• high
• level
• tension neutral
• aligned with the casting planeA high apex:
• lengthens the stroke
• delays rotation
• increases loop apex height
• increases flight duration
• increases distanceA low apex collapses the cast before it begins. A drifting apex contaminates the stroke. A tilted apex destabilizes the loop.Research Reference: Sports Engineering Simulation Models: Vertical loop geometry and apex height determine flight duration and distance potential.5. Crisp Deceleration Stop
The stop is the moment the cast becomes a loop.The stop is the single largest determinant of loop speed.
Spey casting requires:
• bottom hand deceleration
• rod butt stopping in space
• unified casting plane
• high, level stop positionA crisp stop:
• tightens the loop
• stabilizes the apex
• suppresses rod tip vibration
• maximizes line speed
• preserves trajectoryA soft stop kills distance. A drifting stop destroys apex height. A body impact stop collapses geometry.Research Reference: Hakamata et al., 2026 - Robotics (MDPI): Controlled deceleration suppresses rod tip vibration and stabilizes loop formation.Why These Five Laws MatterThese five laws are not regional. They are not stylistic. They are not optional.They are the mechanical DNA of Spey casting.Every correct Spey cast - Skagit, Scandi, mid belly, long belly, single-hand Spey - expresses these laws. Every failure violates one or more of them.When these laws align, distance is not added. Distance is revealed.Conclusion
These five laws form the foundation of modern Spey casting:
• Straight line tip path
• Continuous tension
• Translation → late rotation
• High apex
• Crisp stopThis is Spey casting - the mechanical architecture of long-range, high-efficiency two-handed casting.The Five Laws define Spey casting everywhere.
Core Mechanics define how those laws are expressed in Surf Spey.
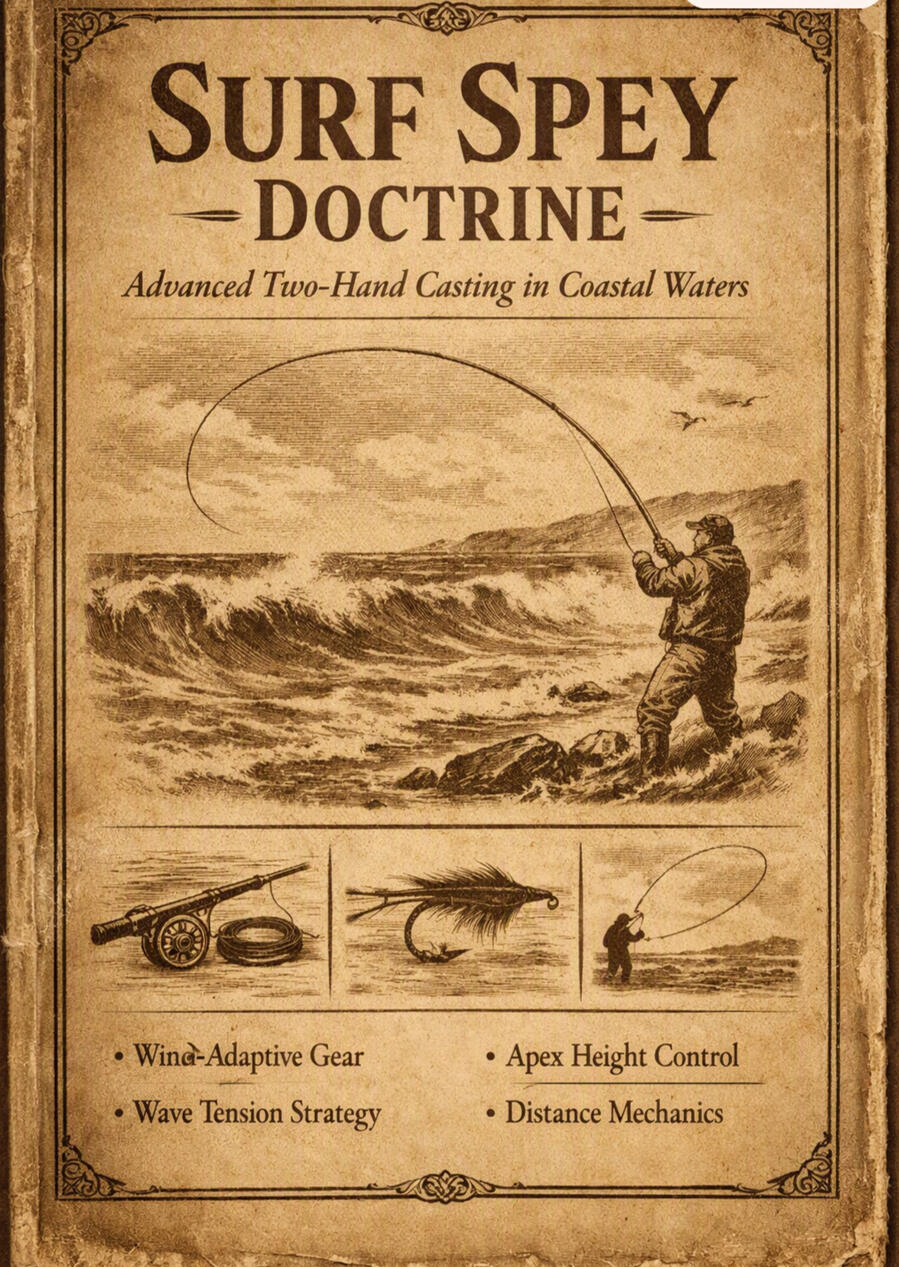
Core MechanicsSurf Spey is not a style. It is a mechanical system.Every cast in the surf is governed by geometry, tension, alignment, apex height, and stroke architecture. The wave cycle, the surf zone, and the long rod mechanics demand a casting discipline built on structure, not preference.This page defines that structure.
Surf Spey Core Mechanics formalize the entire chain:
• effective load
• apex height
• sweep geometry
• drift and slide
• translation
• forward stroke architecture
• hard stop geometry
• seam tracking
• weight transfer
• lower body alignmentEach doctrine explains one link in the system. Together they form the complete mechanical architecture required for high apex, tension driven, long range Surf Spey casting.This is a mechanical canon for Surf Spey. It is built on physics, not tradition. It is built on geometry, not style. It is built on tension, not power.If the mechanics are correct, the cast works. If any link breaks, the cast breaks.These are the Core Mechanics of Surf Spey.
Surf Spey Apex MechanicsHow Line Height Controls Stability, Turnover, and DistanceIn Surf Spey, the height of the line during the cast - the apex - decides almost everything:
• whether the loop stays stable
• whether the line turns over
• whether the cast sags
• whether the tip gets wrapped
• how far the cast can travelThe apex is the “high point” of the cast. If it is high, the cast stays strong. If it is low, the cast falls apart.1. What the Apex Really Is
The apex is simply the highest point the line reaches during the cast.It’s shaped by:
• how high you lift the rod
• how you sweep the rod back
• how you settle the rod (drift)
• how high you hold the rod during the glide
• how you pull forward
• how the rod unloads
The apex is the “vertical backbone” of the cast.2. How Apex Height Is Created
Lift → Sweep → Drift → Glide → PullThese five moves happen smoothly, one flowing into the next.A. Lift - Starting the Cast HighLift raises the rod and the line.
A good lift:
• starts the cast high
• keeps tension
• sets the height for everything that follows
A low lift puts the whole cast in a weak position.B. Sweep - Lining Things UpSweep is the backward motion. It lines up the cast and builds tension.
Sweep:
• sets the direction
• keeps the line tight
• gets the rod ready for the forward stroke
Sweep does not raise the apex. It’s a horizontal move, not a vertical one.C. Drift - Settling the RodDrift is a small, gentle move right after the sweep.
Drift:
• keeps the rod high
• keeps tension
• prevents slack
• sets the rod in the right spot for glide
It is a tiny adjustment that keeps everything stable.D. Glide - Creating the High RailGlide is where the apex is really built.
Glide:
• holds the rod high
• keeps the line tight
• prevents tip wrap
• sets the height for the forward stroke
A high glide creates a high apex. A low glide drops the apex and weakens the cast.E. Pull - Stretching the Apex ForwardPull is the start of the forward stroke.
Pull:
• stretches the tension path
• raises the apex even more
• tightens the loop
• sets up the rotation and turnover
A high pull keeps the apex high. A low pull drops it.
Pull is the “height extender.”3. What Happens When the Apex FailsIf the apex drops too low, the cast breaks down.
A. Sag
The bottom leg of the loop droops.
B. Turnover Failure
The line won’t finish turning over.
C. Tip Wrap
Slack forms, and the line jumps into the rod tip.
D. Distance Ceiling
The cast hits a wall and won’t go any further.
E. Anchor Problems
The anchor sticks, drags, or releases incorrectly.Apex failure is always a height problem.4. Why Apex Height Controls DistanceDistance comes from height, not weight.
A high apex:
• keeps the cast tight
• keeps tension longer
• keeps the loop stable
• keeps the line flying clean
• gives the cast more time to travel
• increases line speed
• increases distanceA low apex shortens the cast, regardless of the line you use.Distance is a height problem, not a power problem.5. The Apex RuleHigh apex = long tension = long cast. Low apex = short tension = short cast.If the apex rises, the cast gets stronger. If the apex drops, the cast breaks down.6. Why This MattersThis doctrine explains:
• Why do casts sag
• Why turnover fails
• Why does a tip wrap happen
• Why distance hits a ceiling
• Why anchors misbehaveIt turns apex height into a simple, teachable concept. This is Surf Spey in plain language.

The Forward Stroke DoctrineHow the Cast Actually Launches, Rotates, and Turns OverIn Surf Spey, everything before the forward stroke - lift, sweep, drift, glide - is set up. The forward stroke is where the cast truly happens. It is the moment the rod unloads, the loop forms, and the line flies.If the forward stroke is clean, the cast works. If the forward stroke breaks, nothing else matters.This doctrine defines the principle:The forward stroke is the launch. Rotation is the ignition. Turnover is the finish.What the Forward Stroke Really IsThe forward stroke is the motion that sends the line forward.It has three parts:
1. Pull - the start of the forward motion2. Rotation - the moment the rod unloads3. Finish - the turnover and loop completionThese three parts decide:
• loop shape
• turnover quality
• line speed
• distance
• stability
• sag
• tip wrap risk
The forward stroke is the engine of the cast.Pull - The Start of the Forward StrokePull begins the forward stroke.
Pull:
• moves the rod forward
• stretches the line
• tightens tension
• sets the rotation window
• starts the loop formationA strong pull creates a long, clean tension path. A weak pull shortens the cast and destabilizes the loop.Pull is the “launch ramp” of the cast.Rotation - The Moment Everything HappensRotation is the most important part of the forward stroke.
Rotation:
• unloads the rod
• forms the loop
• creates line speed
• drives the cast forward
• determines turnover qualityRotation must be:
• late
• crisp
• controlled
• smoothIf rotation happens too early:
• the rod unloads before tension is ready
• the loop collapses
• turnover fails
• sag appears
• distance dropsIf rotation happens too late:
• the rod unloads too low
• the apex collapses
• the line crashes
Rotation is the “ignition” of the cast.Finish - The Turnover
Turnover is the final part of the cast. It’s the moment the line completes its forward roll and straightens.A good turnover:
• finishes high
• stays tight
• stays clean
• stays in tension
• lands straightA bad turnover:
• collapses
• sags
• kicks
• piles
• wraps the tip
Turnover is the “landing gear” of the cast.What Breaks the Forward StrokeThe forward stroke breaks when:
A. Pull is weak
The cast starts with slack.
B. Rotation is early
The rod unloads before tension is ready.
C. Rotation is late
The rod unloads too low.
D. The finish is rushed
The line piles instead of straightening.
E. The finish is too soft
The line loses speed and collapses.Every Surf Spey failure in the forward stroke comes from one of these five problems.Why the Forward Stroke Controls DistanceDistance comes from:
• how long tension stays alive
• how clean rotation is
• how tight the loop is
• how well turnover finishesA strong forward stroke:
• keeps tension
• keeps the loop tight
• keeps the line flying clean
• gives the cast more time to travel
• increases line speed
• increases distanceA weak forward stroke kills distance instantly.Distance is a forward stroke problem, not a power problem.The Forward Stroke RuleStrong pull = strong launch. Late rotation = tight loop. Clean finish = clean turnover.If these three happen, the cast works. If any breaks, the cast breaks.Why This Matters
This doctrine explains:
• why loops collapse
• why turnover fails
• Why cast piles
• why does a tip wrap happen
• why distance hits a ceiling
• why some casts feel “heavy,” and others feel “light”It turns the forward stroke into a simple, teachable concept.
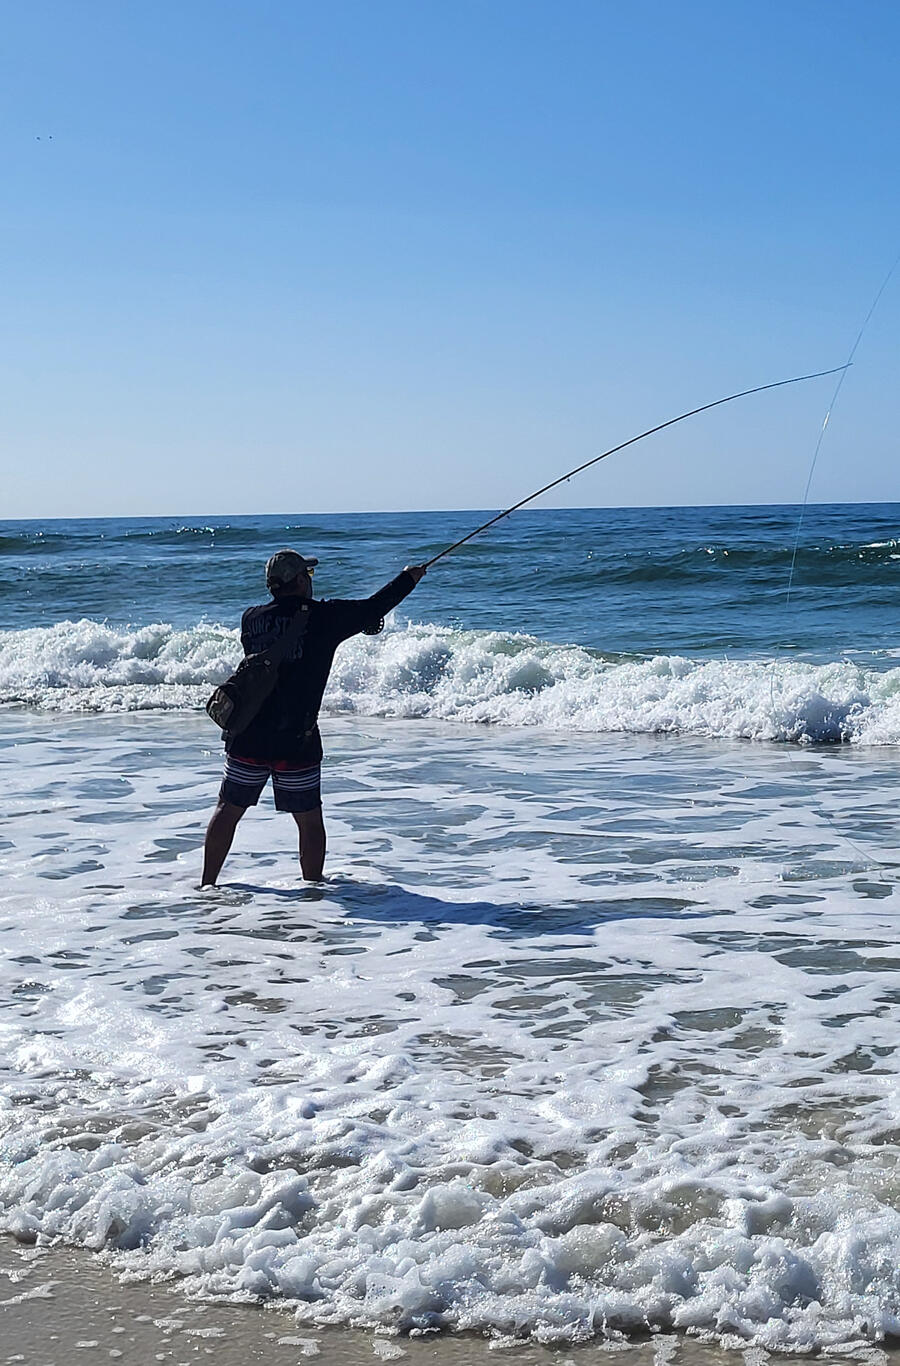
DRIFT AND SLIDEA MECHANICAL ANALYSIS OF POSITIONING MOVES WITH THE TIP RIDING A LEVEL PLANEPurpose of Drift and SlideDrift and slide are positioning moves, not power moves. Their function is to:
1. Set the rod in the correct geometric position for the forward stroke.
2. Preserve the forward stroke plane by preventing tip drop or tip rise.
3. Control stroke length without adding force.
4. Establish the correct launch height for the intended cast.When executed correctly, drift and slide create a neutral, stable, level tip position from which the forward stroke can begin without compensation.DefinitionsDrift
A lift-and-place movement is performed after the sweep and circle-up. It repositions the rod to a higher, more advantageous starting point for the forward stroke.Key characteristics:
• No rotation added
• No acceleration added
• No tension added
• Pure repositioningSlide
A short, level, forward translation of the rod tip is performed after drift and before rotation. It lengthens the stroke without altering the tip’s vertical plane.Key characteristics:
• Level tip path
• No rotation
• No power
• Micro translation onlyThe Level Plane RequirementThe rod tip must ride a single horizontal plane from the end of the drift through the end of the slide.This prevents:
• Tip drop (causes early load and tailing tendencies)
• Tip rise (causes loss of load and open loops)
• Plane shift (forces compensatory rotation)A level plane ensures the forward stroke begins from a stable, neutral, repeatable geometry.Mechanical Sequence
The correct sequence is:
1. Sweep
2. Drift (lift and place to the desired height)
3. Pause (micro pause; line straightens and stabilizes)
4. Slide (short, level, forward translation)
5. Forward stroke (pull - rotation - stop)Each step has a distinct mechanical purpose and must not be blended.Drift MechanicsHeight
Drift height determines:
• Launch apex
• Stroke length
• Distance potential
Higher drift = higher apex = longer carry and greater distance.Path
Drift must be:
• Upward
• Slightly rearward
• Zero rotation
• Zero acceleration
The rod is simply placed into position.Timing
Drift occurs after the sweep and circle-up. If drift is performed early, it becomes part of the circle-up and alters load timing.Slide MechanicsSlide increases stroke length without altering:
• Tip height
• Tip plane
• Load timing
It is a pre-load positioning move, not a loading move.Length
For most rods:
• 1 inch to 2 inches is correct
• Longer slides introduce instability
• Shorter slides reduce stroke lengthPath
The slide must be:
• Level
• Straight
• Forward
• Zero rotation
Any deviation introduces tip path errors.Why Drift and Slide Must Be SeparateDrift sets height. Slide sets stroke length.
If combined:
• Height becomes inconsistent
• Stroke length becomes inconsistent
• Plane control is lost
• Forward stroke timing becomes unpredictableSeparating the two creates a repeatable, modular sequence.Common ErrorsDrift with rotation
Creates an early load and destroys the forward-stroke geometry.
Slide with tip drop
Forces compensatory lift during the forward stroke.The slide is too long
Introduces slack and delays load timing.No slide
Shortens stroke length and reduces distance.10. Distance ImplicationsDistance is governed by:
• Drift height
• Slide length
• Plane control
• Apex angle
• Late rotationDrift sets the apex. Slide sets the stroke length. Both must be correct before the forward stroke begins.Bottom LineDrift and slide are precision positioning moves that determine the geometry of the forward stroke.When the rod tip rides a level plane from drift through slide, the forward stroke begins from a stable, repeatable, mechanically correct position.This is the foundation of consistent, high apex, long-range surf Spey casting.

Translation After Slide1. What slide doesSlide is just a tiny forward adjustment at the end of your drift.It’s small (about 1 inch)It’s levelIt doesn’t bend the rodIt doesn’t start the castIt doesn’t stabilize the anchorSlide simply finishes your setup before you start the forward stroke.That’s all.2. What happens right after the slideThe moment the slide ends, you start the translation.Translation is the first part of the forward stroke.It feels like a slide because the rod is still:Moving forwardStaying levelNot rotatingNot bendingBut translation is longer and has a different purpose.3. Why do slide and translation feel like one moveBecause they flow together.A Spey caster will feel:A tiny forward move (slide)Immediately followed by a longer forward move (translation)It feels like one continuous forward motion, but it’s actually two phases:Slide → TranslationYou don’t stop between them.
You don’t pause.
You don’t change angles.The purpose changes, not the motion.4. What translation actually isTranslation is simply:A longer forward move that starts the cast but still doesn’t bend the rod.It’s usually:
2+ inches depending on rod lengthLevel
Forward
Smooth
No rotation yet
No rod load yetTranslation’s job is to:
Start the forward stroke
Keep tension
Keep the tip level
Set up the rod for rotationIt’s the “start moving forward” part of the cast.5. The easy way to understand itSlide = tiny forward nudge to finish your setupTranslation = longer forward move that begins your cast
They look similar.
They feel similar.
They happen back‑to‑back.But they are not the same thing.Slide is the last part of the setup.
Translation is the first part of the forward stroke.6. The simplest way to teach it
Tell a beginner:“Make a tiny forward adjustment to finish your setup.Then keep moving forward a little longer to start your cast, but don’t rotate (pull) yet.”That’s it.
That’s slide → translation in Surf Spey.

Surf Spey Hard Stop vs General Instruction Hard StopWhy Torso Contact Destroys Surf Geometry and Why the High Stop Produces Maximum DistanceThe term hard stop appears across many casting traditions, but it does not always mean the same thing.In Surf Spey, the hard stop is a precise geometric mechanic. In General Instruction Casting, the hard stop is often taught as a physical brake.These two interpretations produce completely different rod tip paths, apex heights, and loop shapes.This article defines both versions, explains why they differ, and clarifies why Surf Spey requires a high, non contact stop for maximum distance.THE TWO HARD STOPS1. The General Instruction Hard Stop (Not Used in Surf Spey)
“Drive the rod butt into the torso.”This is a beginner cue used in river based instruction to teach:
• what “stop” feels like
• how rotation is triggered
• how to avoid over pushing with the top hand
It is a body impact stop, not a geometric stop.2. The Surf Spey Hard Stop (Correct)
“Bottom hand stops → rod butt stops → rod rotates → loop forms.”
No body contact. No shove. No collision.This is a crisp deceleration stop, not a physical brake.SCANDI / SKAGIT CLARIFICATIONScandi (River)
Traditional river based Scandi instruction often uses:
• longer heads
• softer rods
• early rotation
• top hand dominanceIn that environment, some instructors teach torso contact stops as a beginner cue. This is a training wheel mechanic, not a requirement of Scandi casting.Skagit (River)
Skagit casting typically uses:
• short, heavy heads
• delayed rotation
• bottom hand dominanceSkagit mechanics generally use a bottom hand deceleration stop with the rod butt stopping in space — no torso contact.Surf Scandi / Surf Skagit
Surf environments require:
• tall apex
• high Drift
• compact Turn
• straight forward stroke plane
• late rotation
• tension continuityBecause of this geometry, torso contact collapses the apex and breaks tension, regardless of head style.Surf Scandi and Surf Skagit both require:
• high stop
• extended top hand
• rod butt off the torso
• late rotation
• non-impact mechanicsThis produces:
• tall apex
• deep rod load
• tight loops
• maximum line speed
• maximum distanceCan You Scandi Cast with No Torso Contact?Yes — absolutely. Extended forward stroke + non-contact stop is mechanically superior in Surf Scandi and Surf Skagit.WHY TORSO CONTACT DESTROYS SURF GEOMETRYSurf Spey requires:
• tall apex
• high Drift
• compact Turn
• straight forward stroke plane
• late rotation
• tension continuity
• bottom hand dominanceTorso contact destroys all of these.1. Apex Collapse
Body impact forces early rotation:
• rod tip dips
• apex height collapses
• D loop shrinks
Surf Spey cannot survive a collapsed apex.2. Diagonal Forward Stroke
Torso contact:
• twists the shoulders
• rotates the torso
• drives the rod tip inside
• diagonalizes the delivery rail
Surf Spey requires a straight, level forward stroke plane.3. Tension Break
Impact interrupts:
• translation
• Pull
• rotation
• apex tension
Surf Spey is a tension-driven discipline.4. Wide, Collapsing Loops
Torso contact:
• forces early rotation
• widens the loop
• kills line speed
• destroys turnoverSurf Spey requires high, tight, tensioned loops.WHY THE SURF SPEY HIGH STOP PRODUCES MAXIMUM DISTANCEThe surf Spey stroke is:
• bottom hand dominant
• compact
• apex driven
• high Drift
• late rotation
• tension preserving
• Surf specificThis geometry requires:
High stop + extended top hand + zero torso contact.This produces:
• tall apex
• deep rod load
• straight forward stroke plane
• tight loops
• maximum line speed
• clean turnover
• maximum distanceThe rod butt stops in space, not against the body.THE SURF SPEY HARD STOP — DOCTRINE DEFINITION
Bottom hand stops → rod butt stops → rod rotates → loop forms.It is:
• crisp
• controlled
• rotation triggering
• tension preserving
• apex inheriting
• non-impactThis is the Surf Spey hard stop.
THE CORRECT STOP POSITION FOR SURF SPEYFor Surf Spey mechanics:
• bottom hand stops 6–8 inches in front of the sternum
• rod butt stays off the torso
• top hand extends slightly
• shoulders stay level
• torso stays square
• rod tip stays on a straight plane
This is the Surf Spey stop geometry.CLOSING
General Instruction Casting uses a body impact hard stop designed for river environments. It collapses apex height, breaks tension, and destroys Surf Spey geometry.Surf Spey uses a crisp bottom hand deceleration that preserves apex height, maintains tension, and produces maximum distance.The longest casts come from:
• high stop
• extended top hand
• no torso contact
• late rotation
• tension continuity
• straight forward stroke planeThis is the Surf Spey hard stop. This is the correct mechanic. This is why Surf Spey casts travel far.
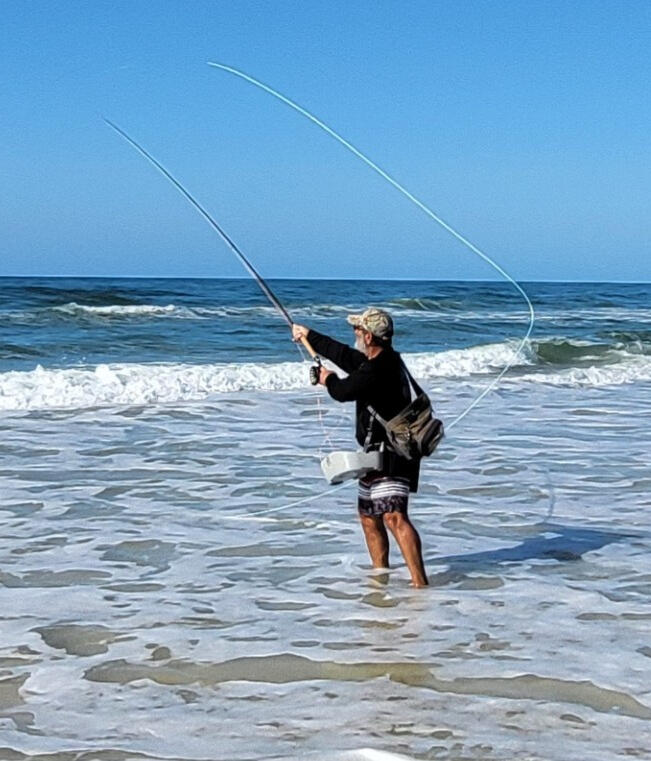
Tracking the Chest Shoulder Seam in Spey Forward Stroke MechanicsThe forward stroke in Spey casting depends on one critical alignment: the rod tip must travel down the chest shoulder seam - the inner anatomical seam where the upper chest transitions into the front of the shoulder.This seam defines the correct forward stroke plane and ensures the rod tip moves in a straight, tensioned path.Core mechanics begin with this alignment. When the rod tip starts and travels on the seam, the forward stroke expresses clean geometry. When it drifts inside or outside the seam, the stroke becomes curved, unstable, and mechanically inefficient.1. The Seam as a Forward Stroke PlaneThe chest shoulder seam is the anatomical plane that naturally aligns with:
• the rod hand
• the elbow hinge
• the bottom hand pull
• the intended forward lane
This alignment creates a single casting plane, allowing the rod tip to accelerate straight through the stroke.The seam is not the outer shoulder line. It is the inner seam — the vertical line between chest and shoulder.2. Rod Tip Alignment on the SeamFor correct forward stroke mechanics, the rod tip must be:
• high
• quiet
• slightly back
• positioned directly over the chest shoulder seamThis alignment sets the rod tip in the correct plane for:
• straight acceleration
• vertical apex formation
• stable anchor relationship
• clean forward lane geometry
The forward stroke begins with the rod tip already on the seam.3. Hand Geometry and the Seam
Top HandThe top hand sits closer to the torso, placing the rod butt slightly forward and aligning the rod tip with the seam.The bottom hand sits slightly farther out, creating room for a straight pull toward the sternum.When both hands operate in the same plane, the rod tip travels straight. This is the core mechanical requirement of the forward stroke.4. Straight Line Rod Tip TravelTracking the seam ensures the rod tip moves in a straight line. Straight line travel produces:
• tight loops
• clean turnover
• stable apex height
• efficient energy transfer
Any deviation from the seam introduces curvature into the rod tip path, which breaks forward stroke mechanics.5. Anchor and D-Loop Relationship
Correct forward stroke mechanics require:
• anchor forward and stable
• D loop apex high
• rod tip aligned to apex
• rod tip outside the anchor
The seam alignment keeps the rod tip outside the anchor and in line with the apex, preserving tension through the stroke.6. Why Seam Tracking Matters in Core MechanicsTracking the chest shoulder seam ensures:
• the rod tip stays in the correct plane
• the hands operate in unified geometry
• the stroke length remains efficient
• the forward lane stays straight
• the apex forms vertically
• the anchor remains stable
These are the fundamental mechanical elements of a correct forward stroke.Core Mechanics SummaryThe chest shoulder seam defines the forward stroke plane. The rod tip must begin and travel on this seam for the stroke to remain straight, tensioned, and mechanically efficient.This alignment is the foundation of forward stroke mechanics in surf Spey casting.
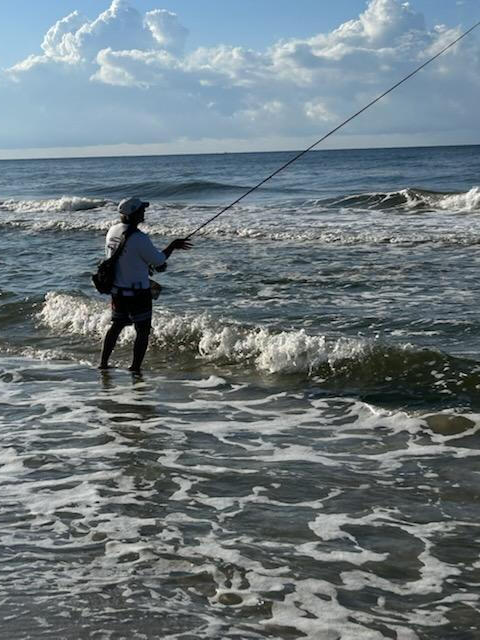
Sweep Geometry: Collapse and Turn MechanicsIn Spey casting, the sweep is the movement that transitions the rod from the anchor into the D-loop formation. The sweep must preserve tension, maintain rod tip alignment, and set the rod into the correct geometry for the drift and ready position.Many casters perform the sweep with locked arms, holding the ready position geometry throughout the sweep. This creates a wide sweep arc, a flat rod tip path, and a low D- loop apex.The correct surf Spey sweep mechanics require a collapse-and- turn pattern: the arms collapse slightly toward the torso during the sweep, then push out at the turn to set the rod into the correct ready- position geometry.1. The Purpose of the Sweep
The sweep must accomplish three mechanical tasks:
• keep the rod tip inside a narrow lane
• maintain continuous tension
• set the rod into the correct geometry for the turn → drift → ready positionLocked arm sweeps fail because they widen the sweep arc and flatten the rod tip path. The collapse and turn pattern keeps the sweep tight, rising, and tensioned.2. Arm Collapse During the Sweep
During the sweep, the arms should collapse slightly toward the torso. This movement is subtle but mechanically critical.Why the collapse matters
• narrows the sweep arc
• keeps the rod tip close to the body
• prevents outward drift
• maintains tension through the sweep
• sets a rising rod tip path
• keeps the sweep inside the 24- inch lane3. The Push Out at the Turn
At the end of the sweep, the caster performs a push-out turn - a small outward extension of the hands that transitions the sweep into the drift and ready position.Why the push out matters
• sets the rod butt into the correct back tilt
• aligns the rod tip with the D-loop apex
• prevents the rod tip from collapsing inward
• creates the correct forward stroke plane
• stabilizes the anchor relationship
• prepares the rod for the drift and ready positionThe push out is the geometric “reset” that converts the sweep into the forward stroke setup.4. Sweep → Turn → Drift → Ready Position
The sweep is not an isolated movement. It is part of a continuous mechanical chain:
lift - collapse - sweep - push out turn → drift → ready positionThis chain ensures:
• the rod tip rises
• the D loop apex forms correctly
• the anchor remains stable
• the rod butt tilts back
• the rod tip aligns with the chest shoulder seamHow the 24" Sweep Lane Produces the 48" Anchor LaneA correctly executed 24 inch sweep lane places the rod tip in the tight, rising corridor required for the push out turn. When the caster pushes out at the turn:
• the rod tip moves outward
• the anchor stays pinned
• the line lands outside the rod tip
• the anchor forms in a 48-inch forward lane outside the casting side shoulderThis wide forward anchor is required for seam-aligned forward stroke geometry, especially with long rods and long heads in Surf Spey conditions.A narrow sweep lane produces a wide forward anchor because the push-out turn moves the rod tip outside the anchor while maintaining tension and alignment.Locked arm sweeps break this chain by freezing the geometry and flattening the rod tip path.5. Why Locked Arm Sweeps Fail
Keeping the arms locked in ready position geometry during the sweep causes:
• wide sweep arc
• flat rod tip path
• low D loop apex
• tension loss
• anchor instability
• misaligned forward stroke planeLocked arms = locked geometry = collapsed sweep mechanics.6. Core Mechanics Summary
Correct sweep mechanics require the arms to collapse slightly toward the torso during the sweep, followed by a push-out turn that sets the rod into the correct geometry for the drift and ready position.A true 24 inch sweep lane produces a 48 inch forward anchor lane, because the push out turn moves the rod tip outside the anchor while maintaining tension and alignment.This collapse and turn pattern keeps the sweep narrow, rising, tensioned, and aligned with the forward stroke plane.

Surf Spey Weight Transfer MechanicsHow Foot Pressure, Hip Rotation, and Lower Body Geometry Control Sweep Height, Turn Radius, Drift Stability, and Forward Stroke AlignmentSurf Spey casting does not begin with the rod. It begins with the ground.Stance establishes the caster’s geometric base. Weight transfer determines how that geometry moves through the Sweep, Turn, Drift, and Delivery.Lower body mechanics are the foundation of Surf Spey. They control rod tip height, Turn radius, apex stability, and forward stroke alignment.This page defines the Surf Spey weight transfer system and explains how the feet, legs, and hips drive the cast.THE PURPOSE OF WEIGHT TRANSFERWeight transfer establishes:
• stability against wave surge
• the height and width of the Sweep
• the radius of the Turn
• the stability of the Drift
• the direction of the inward Pull
• the plane of the forward strokeStance is static. Weight transfer is dynamic. Together they define the lower body architecture of the cast.THE WEIGHT TRANSFER CHAINSurf Spey lower body mechanics follow a strict chain:
Feet → Knees → Hips → Torso → Rod TipWhen this chain moves in sequence, the rod tip travels a clean, rising path. When any link breaks, the rod tip collapses, drifts diagonally, or loses tension.The lower body determines the rod tip’s freedom.1. FOOT PRESSURE CONTROLS SWEEP HEIGHT
Lead Foot Pressure
• raises the Sweep
• supports a tall Turn
• stabilizes Drift height
• promotes a high apex
Rear Foot Pressure
• lowers the Sweep
• narrows the Turn
• reduces Drift height
• produces a flatter apexSurf Spey requires a rising Sweep. This means the caster must bias pressure toward the lead foot as the Sweep begins.Foot pressure is Sweep geometry.2. WEIGHT SHIFT CONTROLS TURN RADIUSOpen Stance → Lateral Weight Shift
• wide Turn
• tall apex
• rotational freedom
• high Drift stabilityClosed Stance → Forward Weight Shift
• compact Turn
• disciplined apex
• straight forward stroke plane
• natural inward Pull vectorThe stance determines the direction of the weight shift. The weight shift determines the Turn radius.Turn radius is lower body driven.3. HIP ROTATION CONTROLS THE TURN AND THE DRIFTThe hips are the pivot of Surf Spey.
Active Hip Rotation
• widens the Turn
• raises the rod tip
• supports tall Drift
• maintains tension through the turnHip rotation is apex control.4. LOWER BODY STABILITY CONTROLS DRIFT HEIGHTDrift is not an upper body mechanic. It is a lower body mechanic expressed through the rod tip.Stable Lower Body
• tall Drift
• high apex
• clean Float
• predictable forward stroke planeUnstable Lower Body
• collapsing Drift
• wandering apex
• diagonal forward stroke
• inconsistent tensionDrift height is determined by the hips and feet, not the hands.5. FOOTWORK CONTROLS FORWARD STROKE ALIGNMENTThe forward stroke inherits the lower body geometry.Open Stance
• rotational forward stroke plane
• wide delivery rail
• tall apex inheritanceClosed Stance
• straight, level forward stroke plane
• disciplined delivery rail
• strong inward Pull vectorForward stroke alignment begins at the feet.6. LOWER BODY MECHANICS AGAINST WAVE SURGEThe wave cycle acts on the caster as much as the line.Push
Absorb with knees and hips. Do not begin the Sweep.Peak
Stabilize feet and hips. Preset tension in the air.Wash
Anchor the lower body. Let the line drift.Drawback
Shift weight, rotate hips, deliver the cast.Lower body mechanics synchronize the caster with the wave.7. WEIGHT TRANSFER DETERMINES APEX HEIGHTApex height is not created by the hands. It is created by:
• lead foot pressure
• lateral or forward weight shift
• hip rotation
• lower body stability during Drift
High apex = disciplined lower body. Low apex = collapsing lower body.
Apex height is a lower body product.8. HAND MECHANICS: WHAT THEY CONTROL — AND WHAT THEY DO NOTHands do not create apex height. They refine the apex that the lower body has already built.Lower body establishes:
• Sweep height
• Turn radius
• Drift height
• apex trajectoryHands establish:
• rotation timing
• acceleration profile
• tension management
• delivery trajectory
• release angleHands can ruin apex height. They cannot create it.Hands Refine. Lower Body Creates.The rod tip inherits its rising path from:
• lead foot pressure
• weight shift direction
• hip rotation
• lower body stability
The hands simply express that path.HOW TO CHOOSE YOUR WEIGHT TRANSFER PROFILEChoose a lateral weight transfer profile if your stroke is:
• tall
• rotational
• wide
• dependent on high Drift/Float
• built on a rising SweepChoose a forward weight transfer profile if your stroke is:
• compact
• inside supported
• torso driven
• dependent on a straight forward stroke plane
• built on a disciplined inward PullIf unsure, begin with closed stance + forward weight shift + squared torso. This produces the most stable forward stroke plane and the cleanest alignment chain.CLOSING
Surf Spey stance is the geometric base. Weight transfer is the dynamic engine.The feet control Sweep height. The hips control Turn radius. The lower body controls Drift stability. The alignment chain controls the forward stroke.Surf Spey lower body mechanics are not style choices. They are structural decisions.When stance and weight transfer are correct, the rod tip travels a clean, rising path that supports high apex Surf Spey casts.Choose the weight transfer profile that matches your mechanics and preserves alignment.
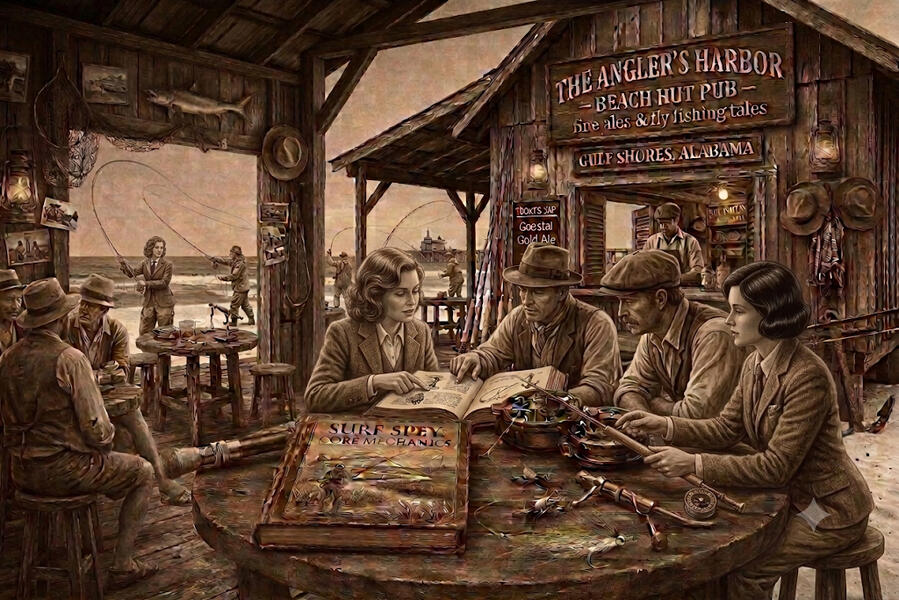
Surf Spey Stroke ChainThe Unified Mechanical Sequence of Surf Spey CastingIntroduction
Surf Spey is a mechanical chain.
Every cast in the surf is a continuous sequence of tension- driven events. Each link inherits geometry, tension, and alignment from the one before it. If any link breaks, the cast breaks.This page defines the complete Surf Spey stroke chain - the unified sequence that integrates wave timing, anchor behavior, apex geometry, stroke architecture, and tension inheritance into one continuous casting system.I. The Stroke Chain (12 Link Doctrine)1. Aerial Reset
Tension is restored in the air, not on the water.
Aerialized lift and roll, lift and flip, or roll cast rebuilds the forward casting plane above the collapsing wave face.
Wave Phase: Push → Peak2. Lift
The lift raises the line into the sweep.
High, clean, tensioned, drag-free.
Wave Phase: Backside of Peak → Early Wash3. Collapse
Arms collapse slightly toward the torso.
This narrows the sweep lane and preserves tension.
Wave Phase: Early Wash4. Sweep
The sweep places the anchor into the 48″ lane.
Rising, tensioned, inside a narrow 24″ rod tip corridor.
Wave Phase: Late Wash → Approaching Drawback5. Turn
A small outward push transitions the sweep into drift.
This sets rod butt tilt and aligns the rod tip with the apex plane.
Wave Phase: Start of Late Drawback6. Drift
Drift lifts the rod tip vertically into the apex clock.
Correct apex: 2 o’clock - high, rearward, level.
Wave Phase: Late Drawback7. Slide
A 1–2 inch level forward translation.
Slide lengthens the stroke without altering height or plane.
Wave Phase: Late Drawback (stable tension)8. Translation
Forward motion begins without rotation.
Translation preserves apex height and tension.
Wave Phase: Late Drawback → Forward Window9. Pull
The bottom hand begins the forward stroke.
Pull stretches the tension path and tightens the loop spine.
Wave Phase: Forward Window10. Rotation
Rotation is late, crisp, vertical.
This unloads the rod, forms the loop, and stabilizes trajectory.
Finish point: bottom hand to solar plexus.
Wave Phase: Forward Window11. Stop
Rod butt stops in space - no torso contact.
The stop preserves apex height and stabilizes loop geometry.
Wave Phase: Forward Window12. Follow Through
A vertical, delayed descent of the rod tip.
Follow through allows the loop to clear and land tension neutral.
Wave Phase: Post deliveryWave Cycle Overlay
The stroke chain maps directly onto the surf’s four phases:
Push → Aerial Reset Peak → Aerial Reset → Lift Wash → Lift → Collapse → Sweep Late Drawback → Turn → Drift → Slide → Translation → Pull → Rotation → StopTiming Doctrine: Push begins the cast. Peak shapes the lift. Wash shapes the sweep. Drawback delivers the cast.Tension Inheritance
Every link inherits tension from the previous:
Reset → Lift → Sweep → Turn → Drift → Slide → Translation → Pull → Rotation → Stop
If tension breaks, the chain collapses.Tension Law: The wave moves the water. You control the tension.Geometry Inheritance
Geometry flows through the chain:
Sweep sets anchor lane. Turn sets plane. Drift sets apex. Slide sets stroke length. Translation sets forward path. Pull sets tension path. Rotation sets loop. Stop sets trajectory.Geometry Law: Geometry must be restored before it can be used.Distance Integration
The stroke chain expresses the Distance Ladder:
60–80 ft → Sweep + Drift + Apex 80–100 ft → Slide + Translation + Late Rotation 100–120 ft → Apex + Stroke Length + Zero Drag + Perfect Timing
Distance is tension preserved through the chain.Closing
The Surf Spey stroke chain is the unified mechanical sequence of the discipline. It integrates wave timing, anchor behavior, apex geometry, stroke architecture, and tension inheritance into one continuous casting system.Surf Spey is not a power system. Surf Spey is a sequence system.
This is the complete chain.